 |
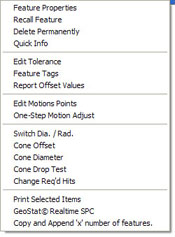
| figure 1, sub menu |
Another very powerful feature available with the Cone analysis tools is
the ability to locate the height off the PCS Base Plane that a specified
diameter exists at. For example if measuring a cone that defines the seating
surface of a valve and the dimensional requirement is to measure the height
where the cone has a diameter of 3.500”. We would use this tool to extract
that solution from the measured cone.
When you have measured the cone, right click on the cone in the
inspection report to activate the sub menu, see figure 1. From the submenu commands,
choose [Cone Diameter], see figure 2.
Enter 3.500 in the Cone Diameter Setup Tool and press <Ok>.
Remember, this is the distance off the current PCS. It is expected that the
axis of the cone is parallel to an axis of the current PCS. You may need to
establish a PCS using the cone as the Orient to ensure accuracy.


