|
|
| |
|
| |
Definition |
| |
Re-Qualifying a stylus updates the current stylus with a
new size and location. Re-Qualification has two main
functions, to validate the current size and location of
your qualified stylus, or to reposition the current
stylus during the inspection process using a manual
indexing friction probe.
The use of the Re-Qualify command as a validation tool
is useful when it is necessary to perform checks on your
stylus database. These validation tests would look for
damaged probes, worn stylus balls, movement of stylus
clusters or any other abnormal conditions that can
adversely affect your inspection results. You may want
to create a Re-Qualify Stylus part program which will
report and update changes in size and location of the
stylus.
Re-Qualifying during the inspection process can be used
to extend the usefulness of a friction style
articulating probe head such as the Renishaw PH1 or PH8.
The Re-Qualification process can be done manually on a
single stylus, or as part of a motion program which can
automatically update the size and MCS location of all
attached styli. |
| |
Stylus Relationships |
| |
Stylus number 1 is
considered the primary position for the entire
stylus database. The relationship between any
stylus and stylus 1 is the MCS offset value in
XYZ values. This offset is applied in
calculations when measuring features. By knowing
this offset value, Geomet can measure a single
feature with multiple probe tip locations.
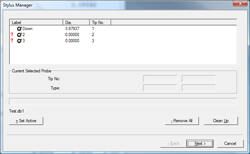
Therefore, when Re-Qualifying stylus number 1,
all other stylus in the database will be marked
as "Pre-Qual". The Stylus Manager will indicate
all styli below number 1 with a "?". All
Pre-Qualified styli will need to be removed or
Re-Qualified before and inspection can take
place. |
 |
|
|
| |
Step 1 |
| |
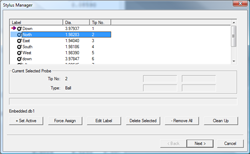
In the Stylus
Manager, choose the stylus to Re-Qualify by
left-clicking on it to highlight.

Press the <Next> button to begin Re-Qualify. |
 |
|
|
| |
Step 2 |
| |
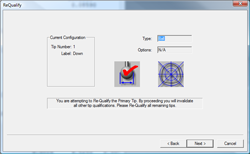
The probe
definition page is displayed, but it is locked
from making any changes. This page is easily
recognizable by the large red check over the
image of the stylus.

Press the <Next> button to begin capturing
data points on the reference sphere.
NOTE: This example demonstrates the basic
electronic touch probe system. Should there have
been a variance in hardware, such as stylus
racks and motorized probe heads, additional
setup pages will be displayed. Visit Qualify a
Stylus for additional information regarding
these pages. |
 |
|
|
| |
Step 3 |
| |
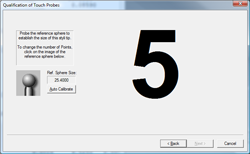
| The final step
will prompt you to capture the data points
required. Once this step has been completed, the
Stylus Database will be updated with the latest
size and MCS location for the selected stylus. |
 |
|
|
| |
Optional Re-qualify Averaging |
| |
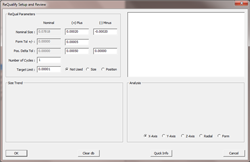
| Geomet released a new results averaging tool with the release of 7.01.279. To configure the Re-qualify feature to run a set number of cycles and average the size and location before updating the stylus, us the Re-Qualify Stylus Averaging tool. |
 |
|
| |
Stylus Manager, Features, Menus and Support Tools |
| |
|


